Backup
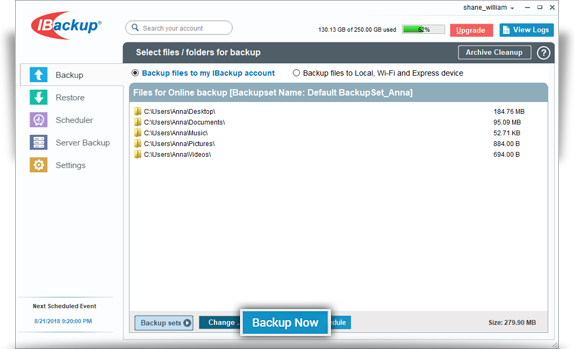
On first time installation, IBackup selects critical folders like Desktop, Documents, Pictures, Videos and Music for backup.
IBackup creates a unique folder on your account with your computer name to backup data.
To perform backup,
1. On the Backup tab, files already selected for backup appear in the backup set.
2. By default, the Backup files to my IBackup account option is selected. Alternatively, to perform a local backup, select Backup files to my local / Wi-Fi device.
3. To remove or add files to the backup set, click Change…, and select the required files or folders and click OK.
4. Click Start Backup Immediately.

You can also schedule your backups to automate data protection.
1. On the Backup screen, click Schedule Backup.
2. Configure the scheduling parameters like backup date, time, frequency, and notification type.
3. Click Save Changes.
During backup, you can view the detailed backup progress status. Click the drop-down icon, to minimize the details.